Showing posts with label Art. Show all posts

Monday, January 20, 2014

Welcome Ya'll Mason Jar Door Hanger Tutorial

Remember how I said I was jumping around? Well this project we worked on over Thanksgiving and I used it as my Yankee Swap present when I got back to school. (also…I'm sorry in advance for the lack of pictures on steps so bear with me as I try to verbally explain :) )


I had pinned this "Welcome Y'all!" mason jar door hanger forever ago and finally got around to making it. 

I made the basic layout in Illustrator. One of my tricks for printing things larger is to print it on multiple pages then tape it together. I already did it for this project so you can download it here! When you print it out choose "do not scale" or "actual size" for your printing option. 


After you print the pages, cut one along the lines and tape it to the adjoining page so the triangles meet. Here's what the full layout should look like.


Next, flip it over and on the back color over the lines (on the back of the piece of paper). This works so that when you put it down on your board and trace over the original lines on the front of the paper, the part that you colored on the back will transfer to the board and leave you a guide to cut from. (Sorry I don't have any pictures of this step but if you need a visual guide look at this here)

Use a jig saw to cut it out of the wood. For the really sharp curves, we used a drill first to make the curves then the jig saw after. And if you cut like me, you'll get a really great flag piece as well from around the mason jar shape :)


Next, I sanded the whole thing down with my palm sander. I used a Behr paint sample from Home Depot to pant it (the sample size was more than enough for the two coats). I repeated the process above to trace the details onto the board once the base coat was dry then painted those on using just craft paint.


Once the whole thing was dry, I drilled the holes in the top for the string then sealed the whole thing with two coats of polycrylic. 

The last step is to put the string though the holes and tie it. I made a bow with burlap wire ribbon to add as a finishing touch.


Now, hang it on your front door and admire your hard work! :)


Sunday, May 5, 2013

Relaunching Bibity Bobity Boo

Hello everyone! As many of you all know, I started Bibity Bobity Boo a few years ago selling baby booties. Well, when I went to Italy last summer, I put my shop on "Vacation Mode" and with all the craziness of the past year in school I haven't gotten it set back up.


But...I've got it all set back up now and it's ready to go!


I have all the old styles...


And a few new ones. These are in the "Pumped Up Kicks" collection. They are a lower cost option without losing any style! They feature bright and bold patterns. Each style is only available in a limited number of booties so styles will circulate through periodically.


And the "Mismatched" collection! They feature bright and bold patterns "mismatched" together. The outside of each bootie is quilting cotton and the inside is the softest polar fleece. Each style is a unique look!


As always, the booties come in a takeout box for easy gifting...


...but I've updated the logo a bit more!


And the new big addition that I'm SO excited about are custom name art paintings.


Which are fun for both nursery and kid's rooms AND for college and sorority themes!


So head on over and check it out:
www.bibitybobityboo.etsy.com

And for the next week, 

take 15% off everything in the store using the code:
relaunch15
(expires May 12!)


Thanks so much for everyone's support and I hope to see you over in the shop :)


And as a P.S...here is a behind the scenes peek at the photo shoot I did for the new baby booties!


We are lucky enough that our back yard backs up to the golf course so we get to enjoy this gorgeous view!

Sunday, April 21, 2013

Washi Tape Keyboard Tutorial


If you've been on any blogs or Pinterest recently, you know that washi tape is EVERYWHERE. Essentially, what it is is Japanese colored tape. It's not super sticky on the back but has a smilier feel to painter's tape.


I saw an idea for this a while back and started it but never really finished it out. So yes, I did keep my keyboard looking like this for about a year...no big deal. But what I can report is that it looked just fine after a year (granted, I keep a cover on my keyboard which I'll show later, but not too bad!) Also, I went ahead and pulled off one of the stickers to see what would happen but it actually didn't leave any residue! 

As prep for this project, I'd recommend cleaning your keys. I just swabbed over mine with rubbing alcohol and it seemed to do the trick just fine.


The first step is buying your washi tape. There are tons of places out there but I got mine from Le Box Boutique on Etsy. It was just under $6 for 8 colors. Each came on a cute little spool and it was way more than enough tape to cover your keyboard. The colors I used were green grid, yellow dots, spring flowers, garden pink, garden blue, grey polkadots, grey diagonal, and blue stripes. If I had to do it again, I wouldn't pick the gray because you can't see it as well on the dark keys. The tape with more color and less white worked out the best.


I used a self healing cutting mat and x-acto knife to cut my tape but really, you could just use scissors and keep it simple. I did it this way because then I could cut them precisely to size.


After I stuck it on the mat, I used a clear ruler to make a vertical cut.


Then I cut the corners off the tape. Again, maybe not necessary but I did notice with the tape I had on my keys before, it was starting to pull up a little at the corners and I figured this was the safest way to go.


Then I pulled it off the mat and stuck it on the key. Don't worry about getting it right the first time. It's really easy to pull the tape back off and reposition it again if you need to.


So there you have it! My colorful keyboard in all of it's glory. I'm kind of obsessed...seeing all the colorful keys make doing real work on my computer seem a little less sad ;) Plus it's a fun way to personalize your Mac since everyone and their mother's looks exactly the same!


Like I mentioned before, I actually do keep a silicone cover on my keys so that if anything spills it won't be able to leak into the guts of my computer. The color is a little less bright that way but you can definitely still see it! 


xoxo,


Saturday, December 29, 2012

The 2012 List

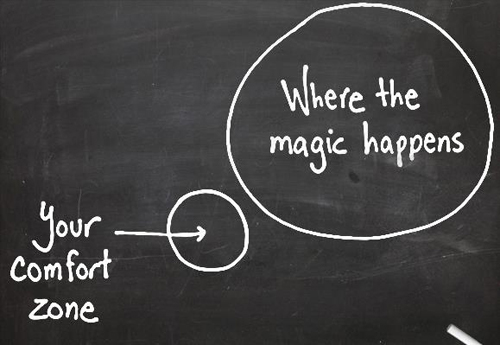
If you've talked to me this year, it is very likely that you've heard me mention my 2012 list. It was my New Years Resolution last year to be more adventurous, try more new things, and push myself out of my comfort zone. Why? Because of this:


I decided the best way to do this would be to have a concrete list of things that I've always wanted to do and had never done. The list wound up having 15 things on it and I accomplished all but 4...which will roll over now onto my 2013 list. I'm just going to share a few checks off the list (some may not have been blog appropriate!) but the funny thing was...as I was living my resolution and trying all kinds of new things, I realized I needed to start a new list: things that should have been on my 2012 list. 


So without further ado...


The 2012 List


Things That Should Have Been On The 2012 List


You'll have to wait and see what is on the 2013 list but a lot of the things on the list have to do with physical activities so a lot of the focus of 2013 is on getting back into shape :) (more about that later!) Also I'm going to try really hard to do a blog post a week...we will see if we can get Abigail on board!


xoxo


Thursday, November 8, 2012

Some Recent Art Work! (aka hey look at me!)

This is my "Hey look at me" post so please humor me! I haven't really shared any art projects that I've done since I've been back since Italy but if you think that means I haven't done much then you don't know me very well ;) 


So without further ado here is some projects that I've done lately!


A Thomas the Train cake for Collins' second birthday!


Reversible bubble skirts for Dagny and Lydia! The pattern is from Lil Blue Boo and fun fact - the purple and yellow plaid fabric is from a sarong from Lauren and Patrick's honeymoon :)


Dad helped me build this faux wooden pallet and I painted the quote from The Help on it for Jani and my "friend-aversary" 


Obviously from this summer but this is what happens when people let me draw on their chalkboards!


I used one of Collins' John John patterns to make this for his birthday! The cuff at the bottom is made from an old tie.


I LOVE how this dress for my friend's daughter turned out. I altered this Oliver + S pattern and the fabric is just from Jo Ann's!


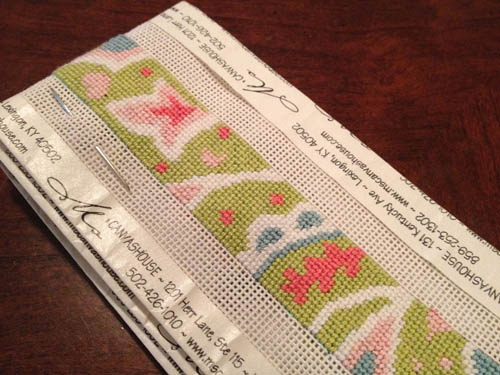
Only slightly sketchy pictures ;) I was supposed to have this needlepoint belt made for Michael's graduation...but that didn't happen. Finished it up during my Italy trip!


And speaking of needlepoint...here's the belt I'm working on for myself. One day I'll finish it!


Another name art...started a last year for Brittany's birthday but I finally finished it up for her this year. (One day I will get them up on my Etsy site...when I finally get my Etsy site back up in the first place...)


Just some quick hair bows for Dagny and Lydia for Halloween!


I was workout Barbie for Halloween and I needed pink sparkly shoes so why not make my own?? Basically you just Modge Podge the shoes, sprinkle glitter on top, and seal them when they dry. Unfortunately, I somehow picked the cheapest shoes from the thrift store and the bottom of my shoes literally disintegrated but they looked good for the night!


Completed another thing off my 2012 list - learn to smock! I'm currently working on a Christmas insert for some overalls for Collins...don't have much done though :)


Just some proof that I actually do school work. These are some gray scale renderings that I've done throughout the semester. It's just pen with marker on top.


This was another finger painting that I did in my art journal. The tutorial/inspiration was from Alisa Burke.


This is what I actually do during lecture classes :) Anyone picking up that I love song lyrics?


I was trying to use up some fabric scraps that I had so these pants were born for Dagny's 4th birthday! The pattern is from Oliver + S (they seriously have the best patterns!)


And last but not least...made these brownies for our election party on Tuesday. No comments on the results but the brownies turned out well. All I did was trace the designs on a small piece of cardstock then cut that out with an exact-o to make my own stencil. You just put that on the brownie then sprinkle powdered sugar on top!


Hope you all enjoyed my mini art show :)


P.S. Has anyone seen the other half of this blog?? I'm declaring her MIA! :)